Introduction
Moralis is a web3 platform that gives a backend service for blockchain tasks. They provide the very best numbers of web3 and NFT APIs for authentication, blockchain account info, and so forth.
We’ll make use of the Moralis IPFS saveIPFS() methodology to add recordsdata (max 1GB) to the IPFS community.
This tutorial is a continuation of How to Store Files on the Blockchain Using IPFS. I will advise you to test it out for a proof of what an IPFS community is.
Conditions
As a prerequisite, you should be conversant in the basics of React.js, which you’ll be able to be taught here.
Demo
Under is the demo video of the IPFS file uploader we’ll construct on the finish of this tutorial:

The recordsdata uploaded with the
saveIPFS()methodology are pinned on IPFS by default
On the finish of this part, you’ll retailer and retrieve recordsdata from the IPFS community with Moralis.
Step 1 – Organising Moralis Server
A Moralis server permits you to use the Moralis SDK to hurry up the event of your dApp. – Moralis
On this first step, we’ll arrange our Moralis Cloud Server and generate our Moralis Server API keys.
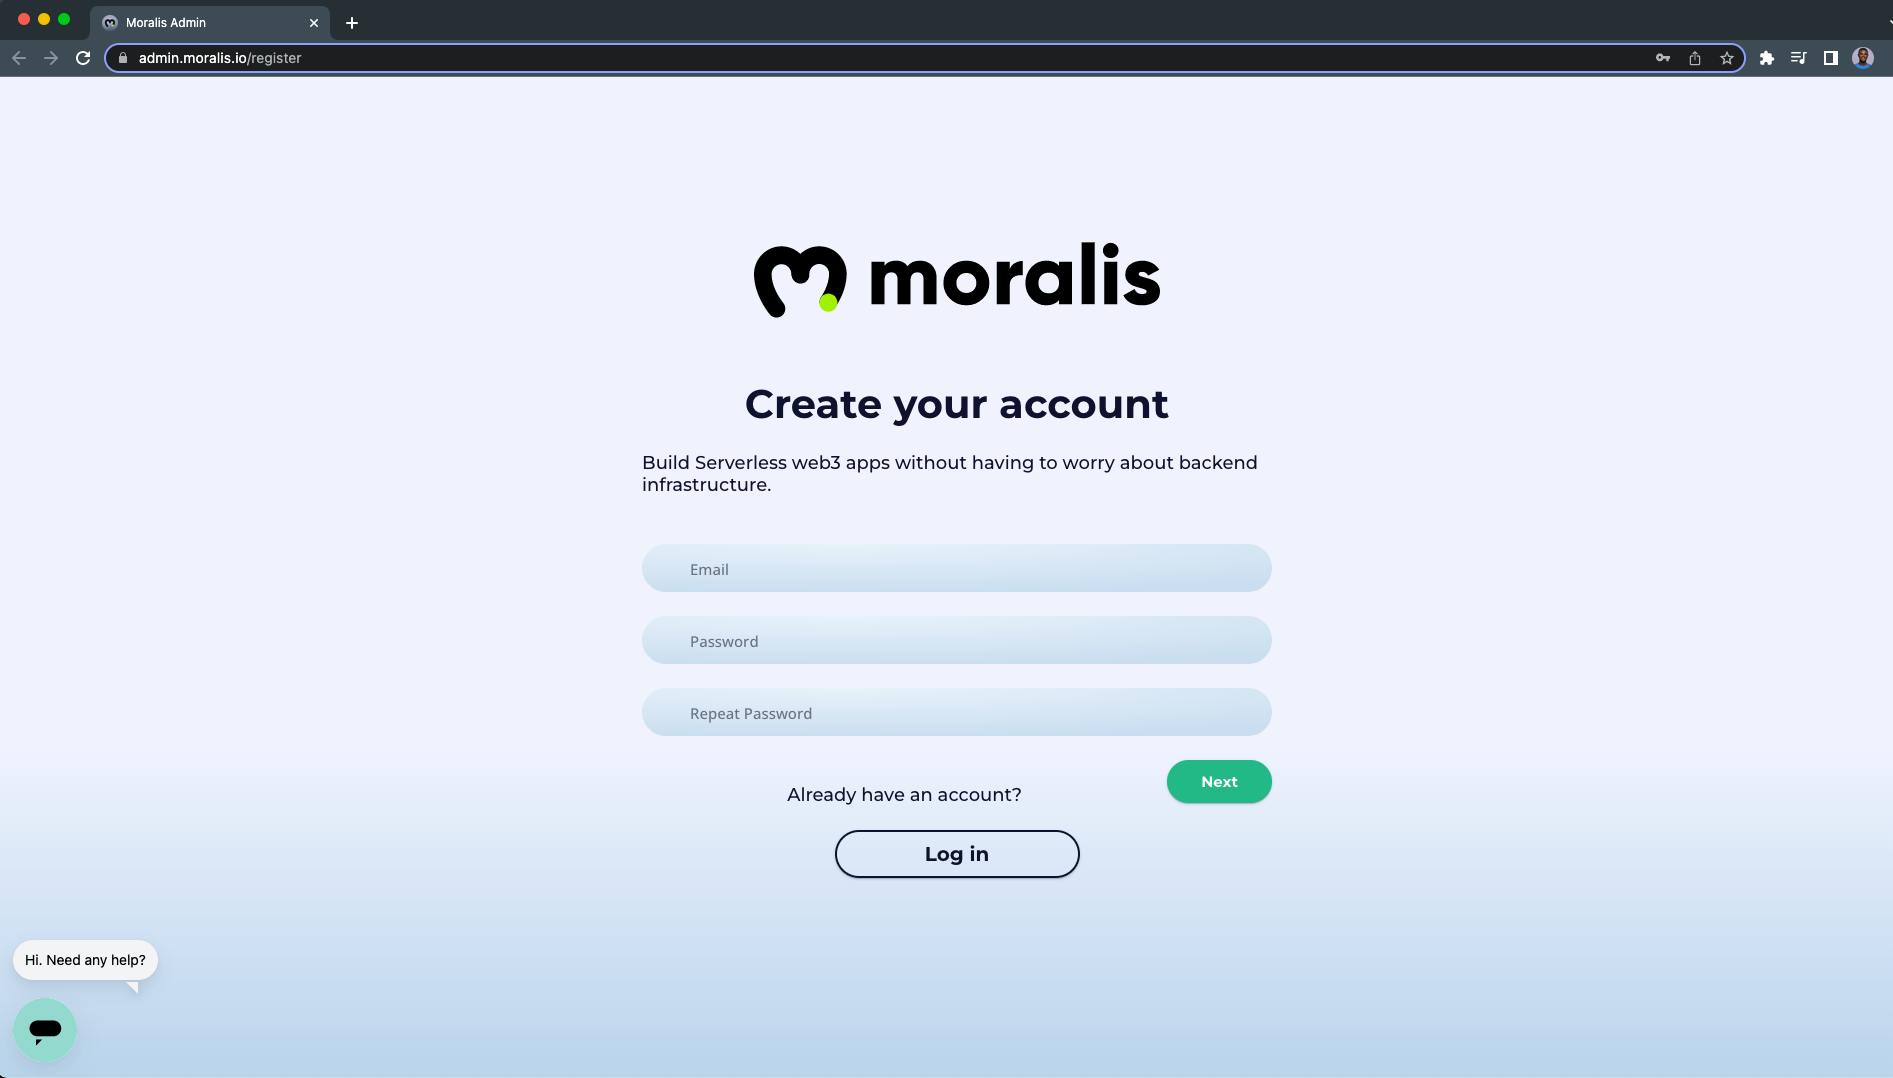
Go to Moralis.io and click on on the “Signal Up for FREE” button:

Present a legitimate e-mail handle with a password to create your Moralis account:
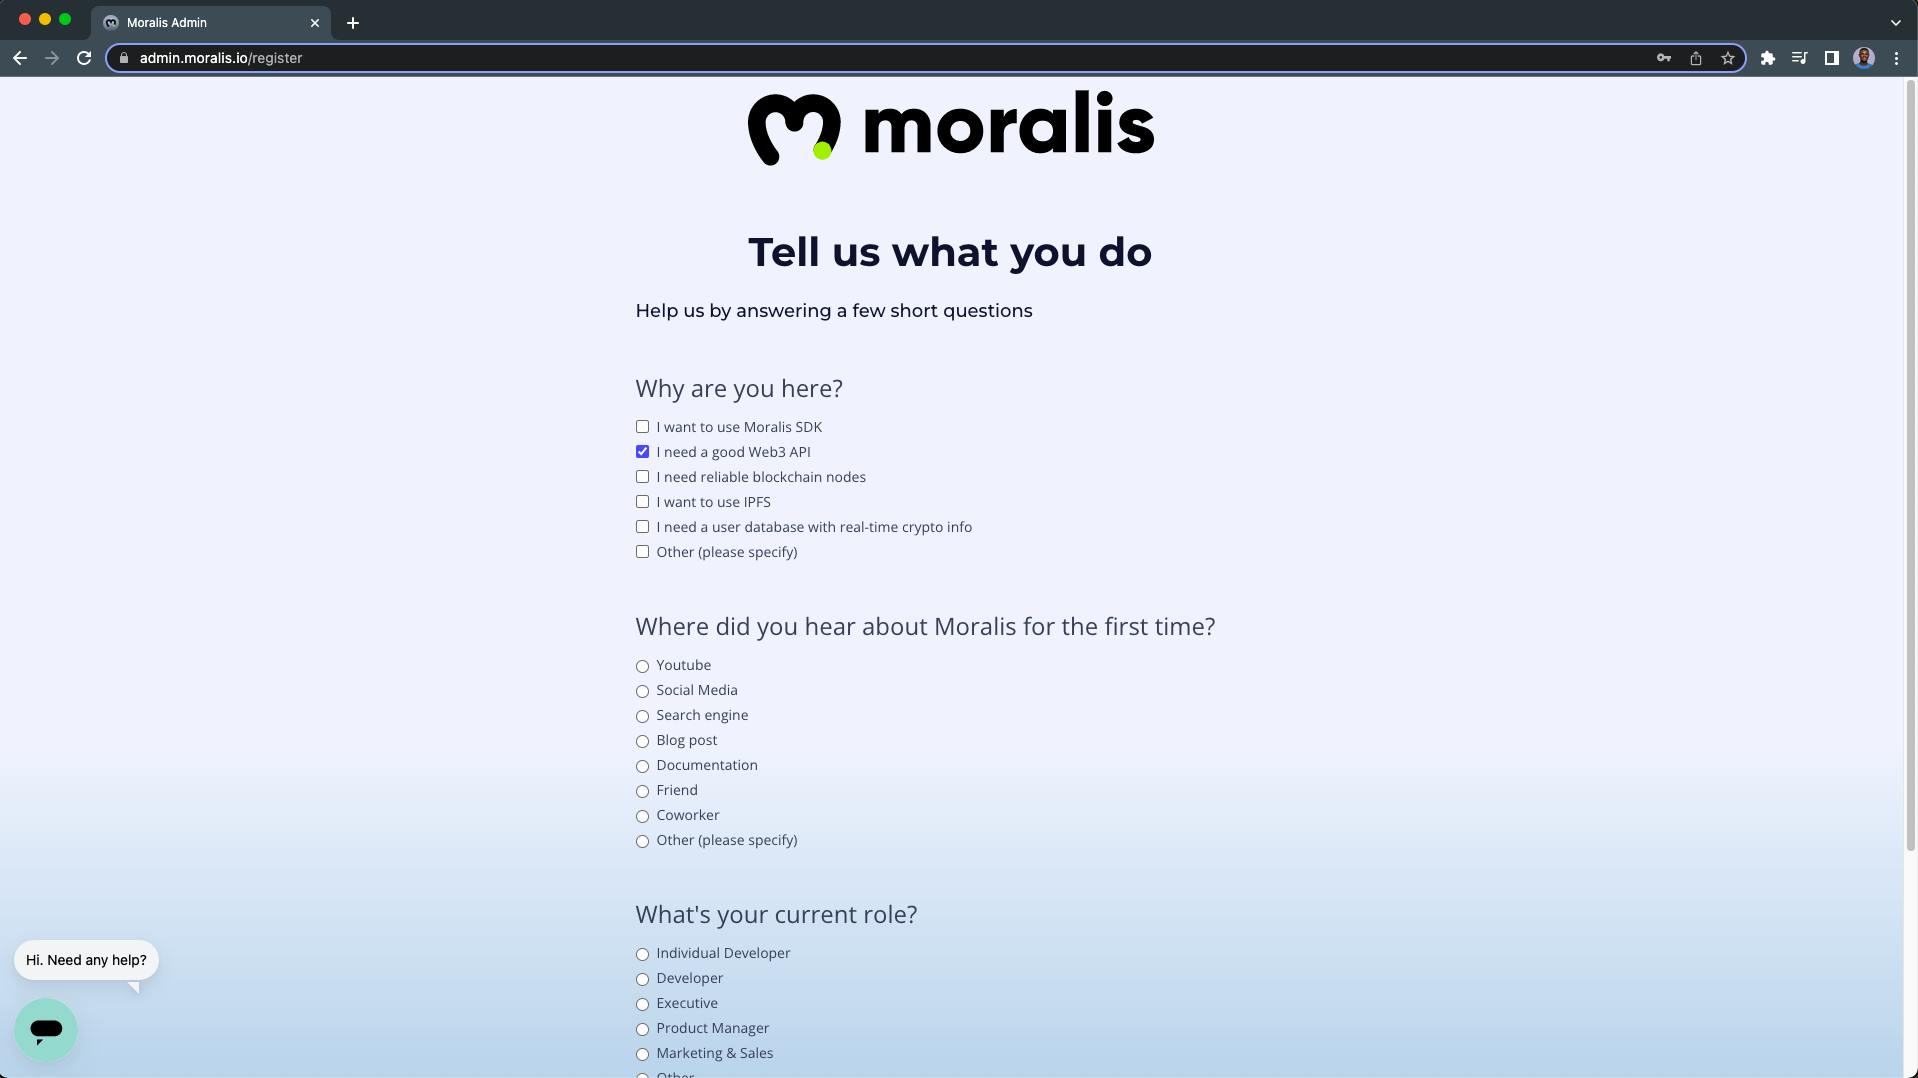
The following web page is the place you may reply a couple of quick questions.
Click on subsequent once you’re completed to create your Moralis account:
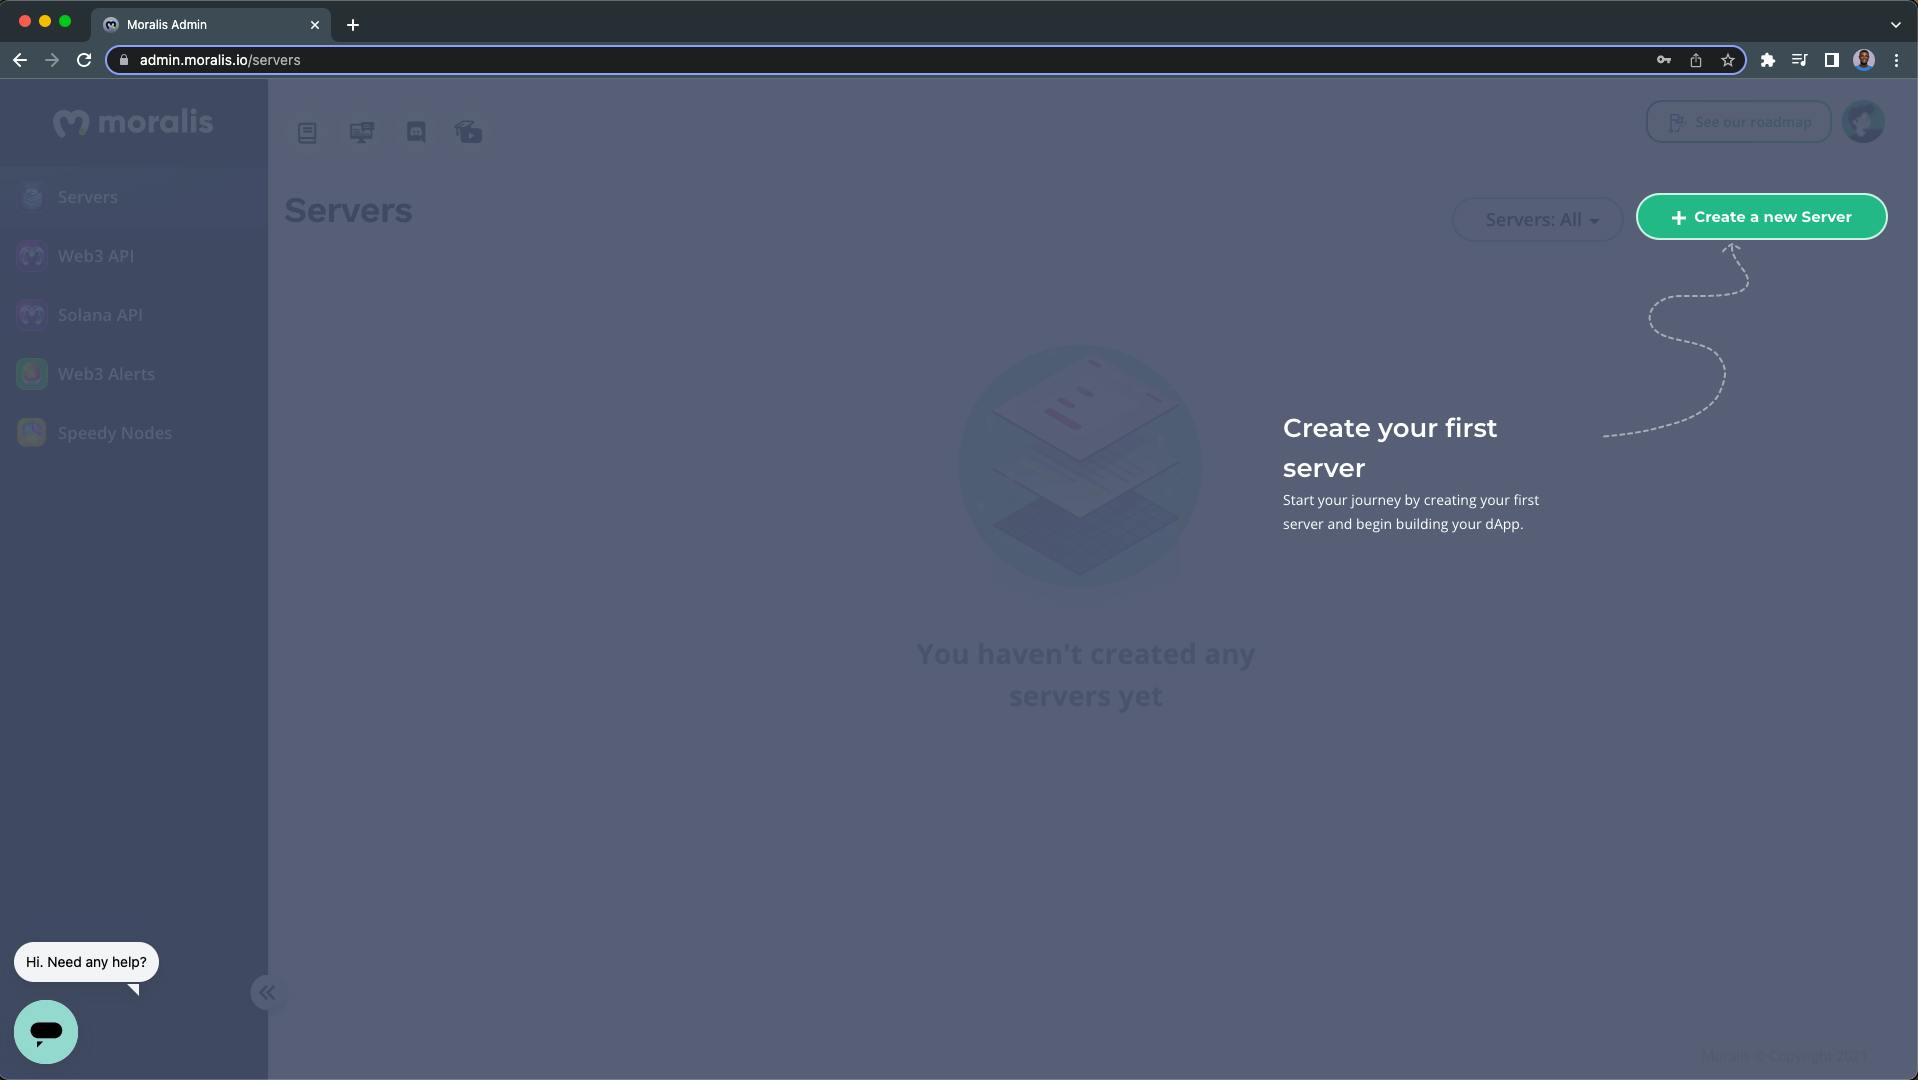
After profitable registration, you may be redirected to your Moralis dashboard.
In your dashboard:
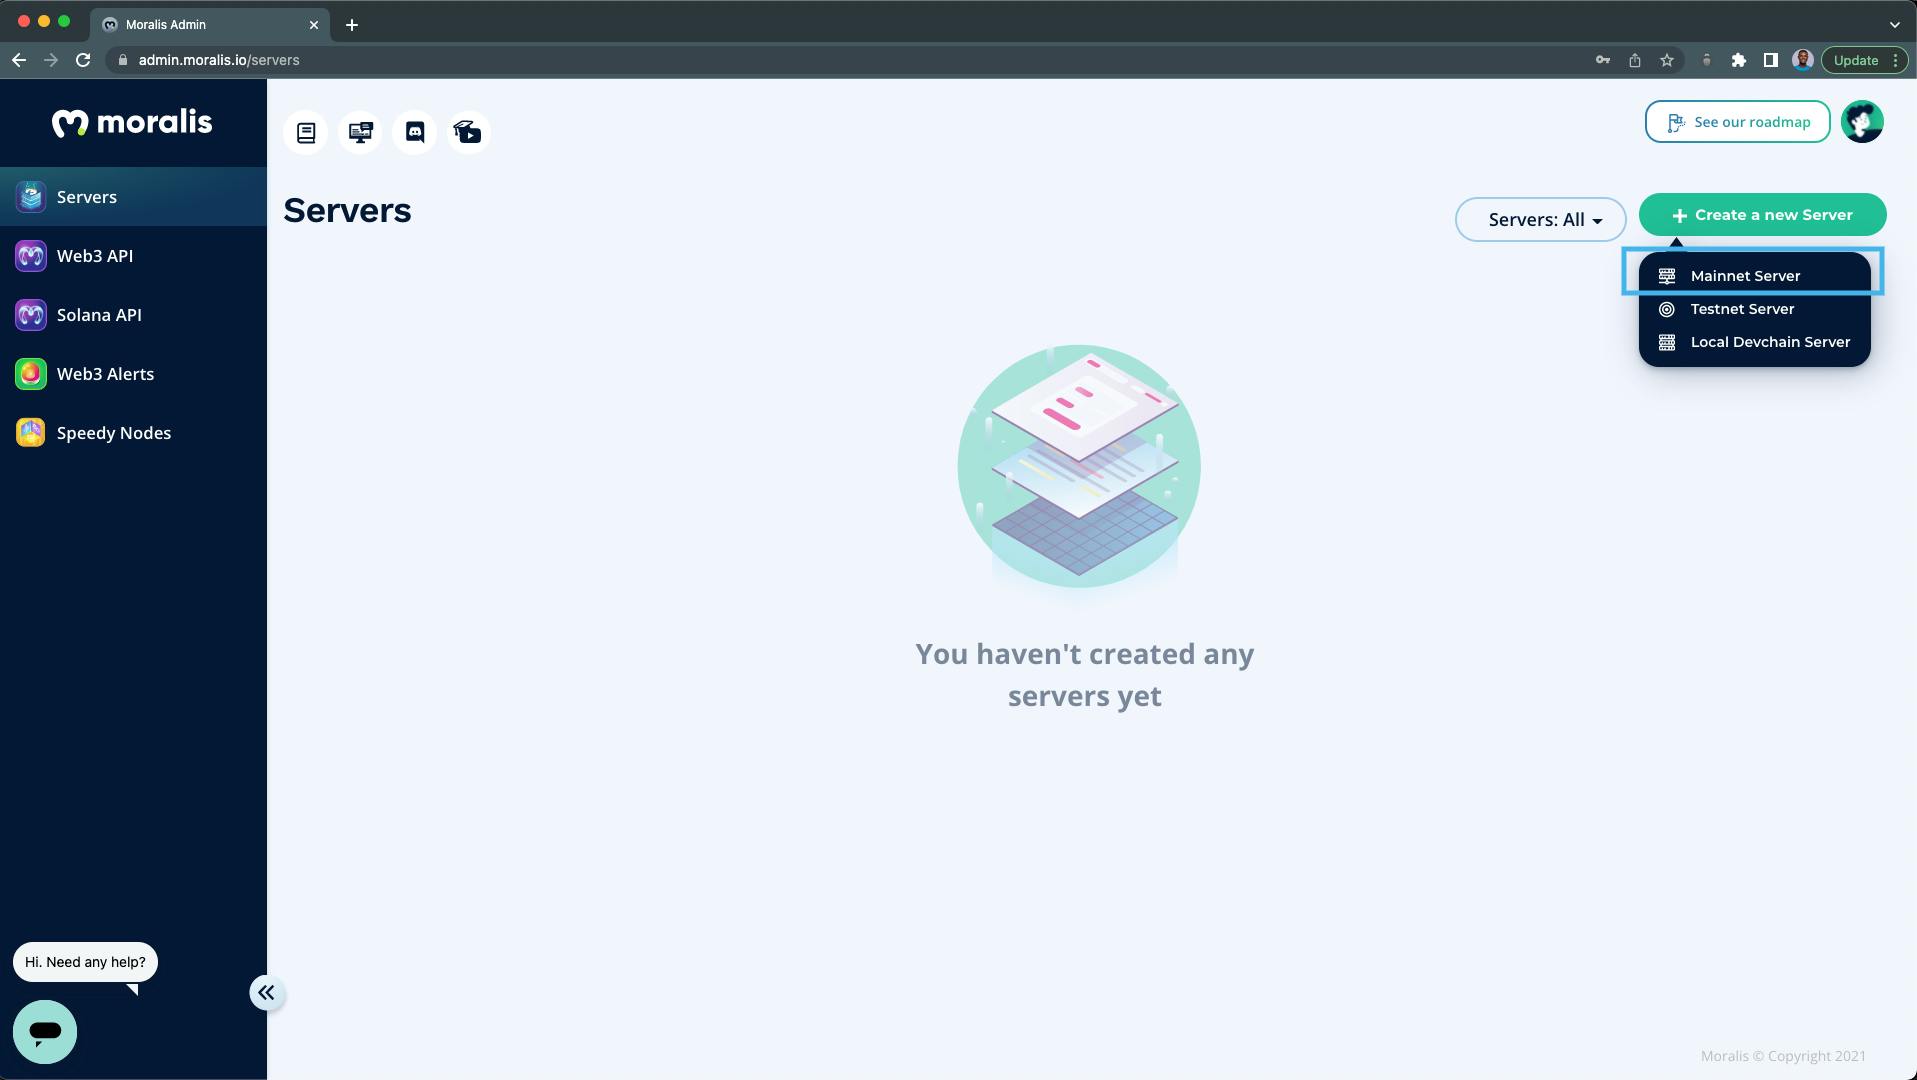
1. Click on on the “Create a brand new Server” button:
2. Choose the “Mainnet Server”:
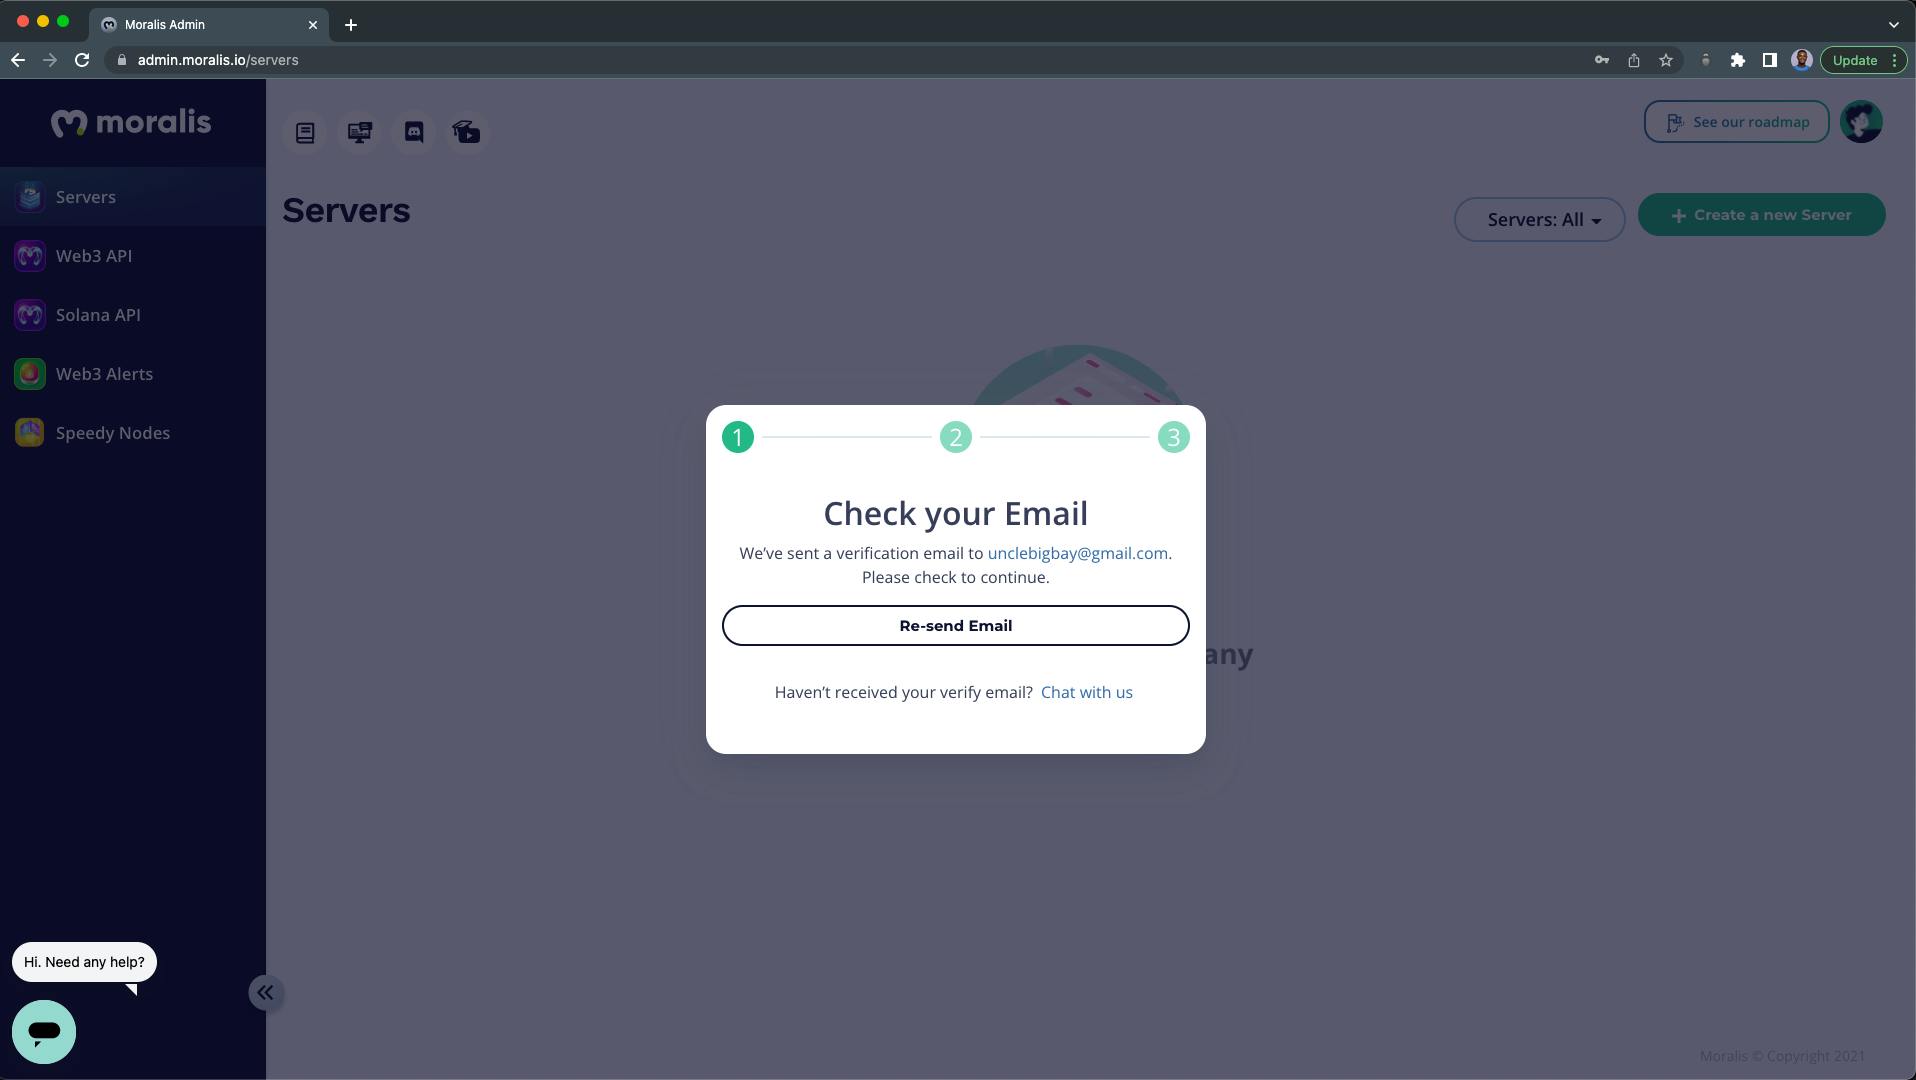
3. You will be prompted to verify your registered e-mail handle:
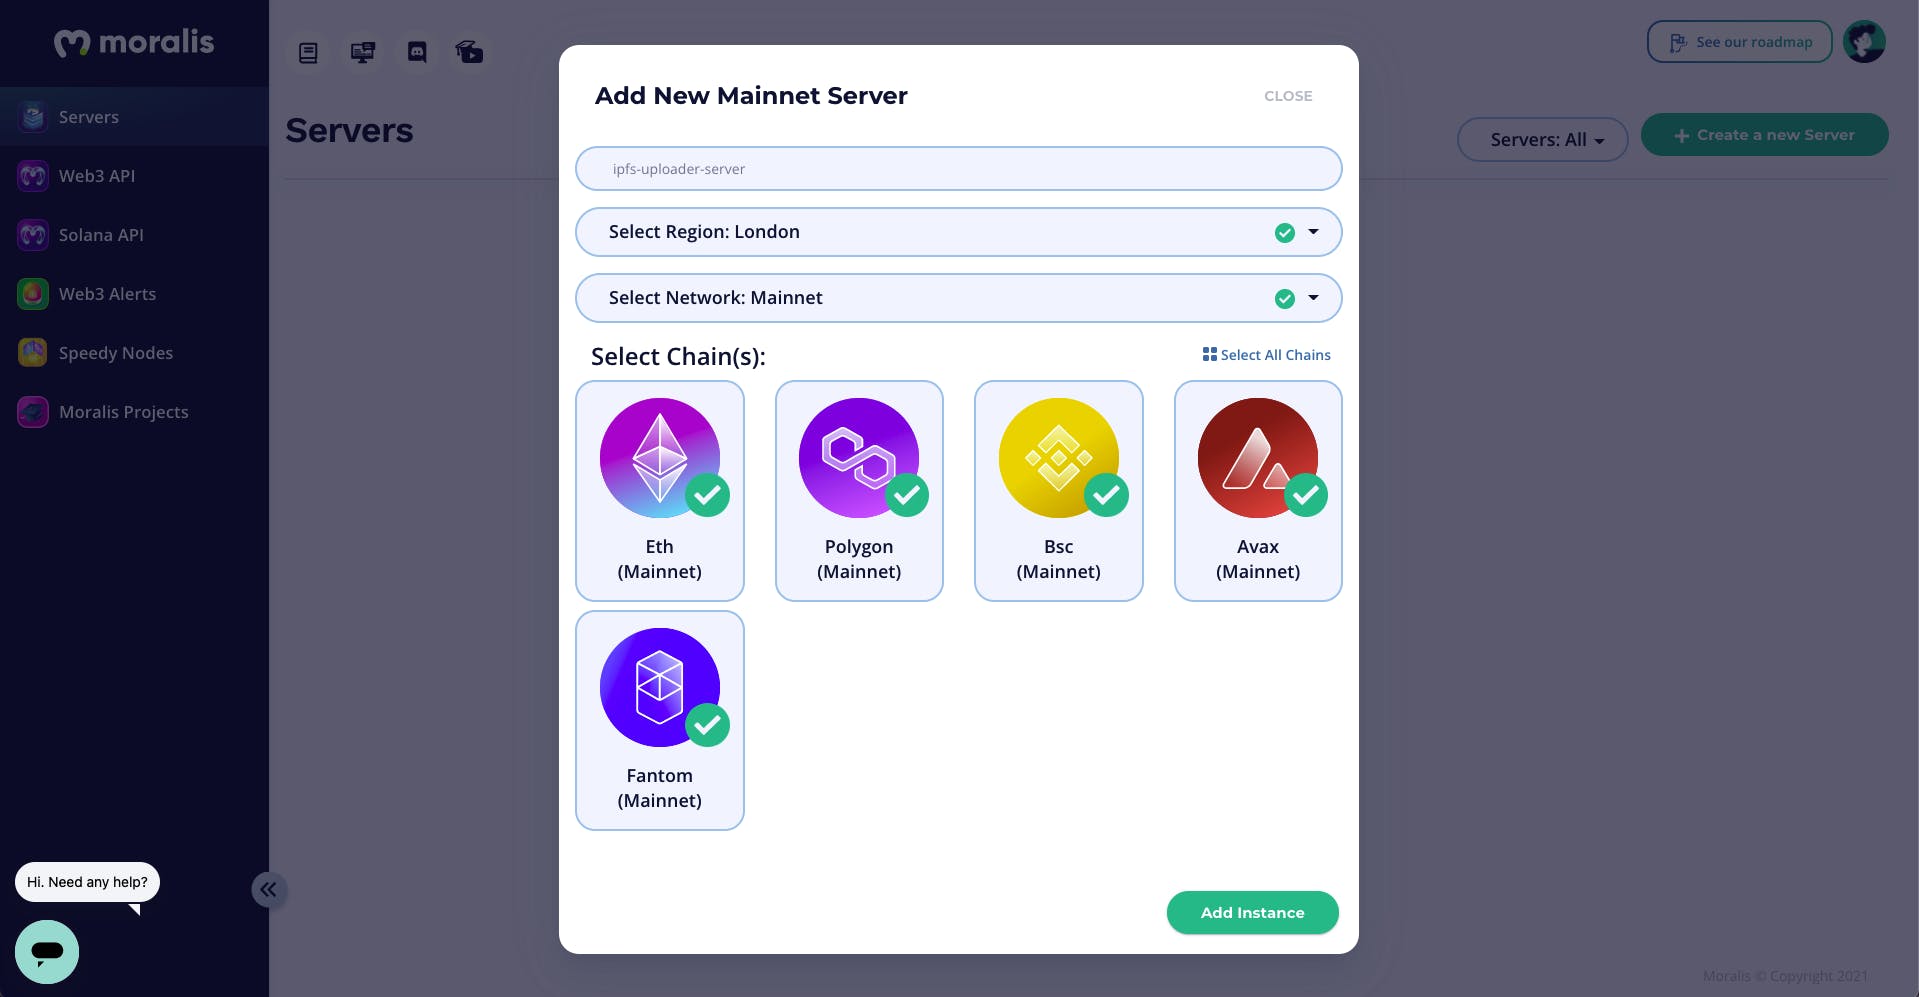
4. Including a brand new Mainnet Server:
From the popup:
- Title your Moralis Server/Occasion (ipfs-uploader-server).
- Choose the Area closest to you.
- Choose a Community (Mainnet).
- For this tutorial, we’ll choose all of the accessible chains.
- Click on on the “Add Occasion” button once you’re completed.
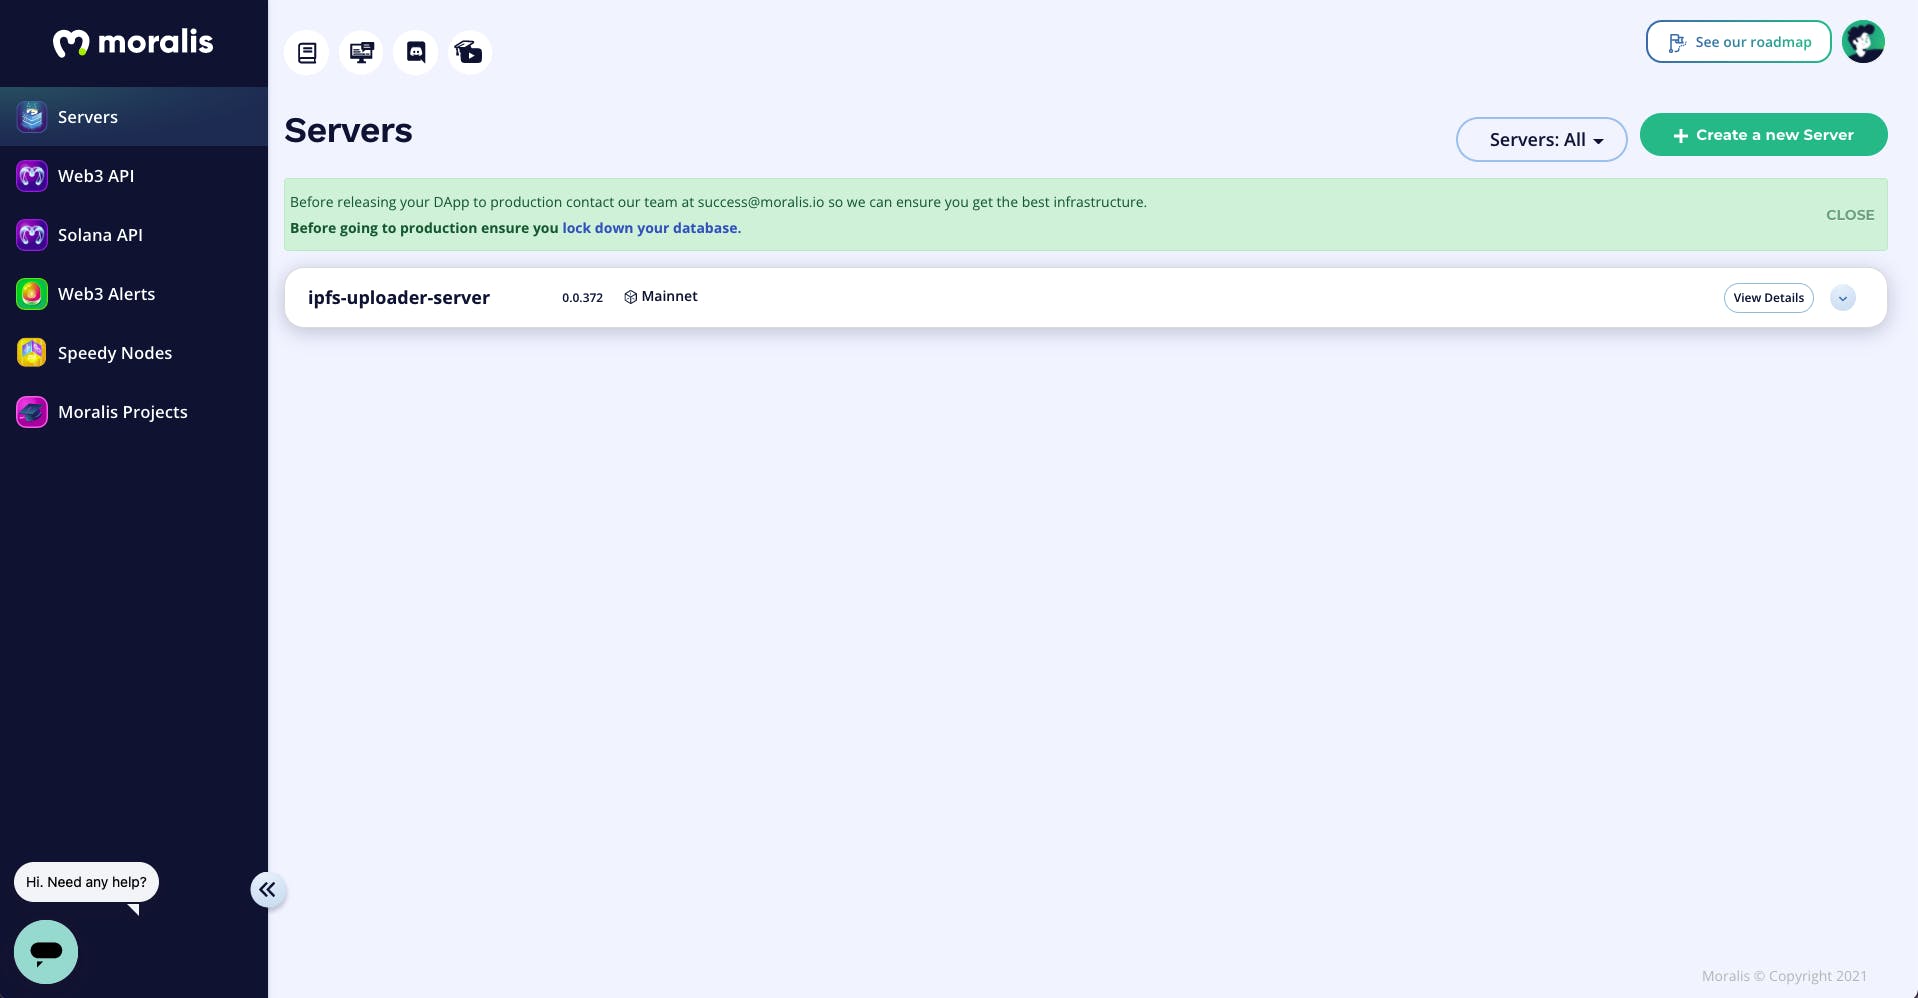
5. Look forward to Moralis to arrange your server occasion:
Step 2 – Moralis Server Particulars
After our server occasion has been created, we will view our server credentials by clicking on the “View Particulars” button:
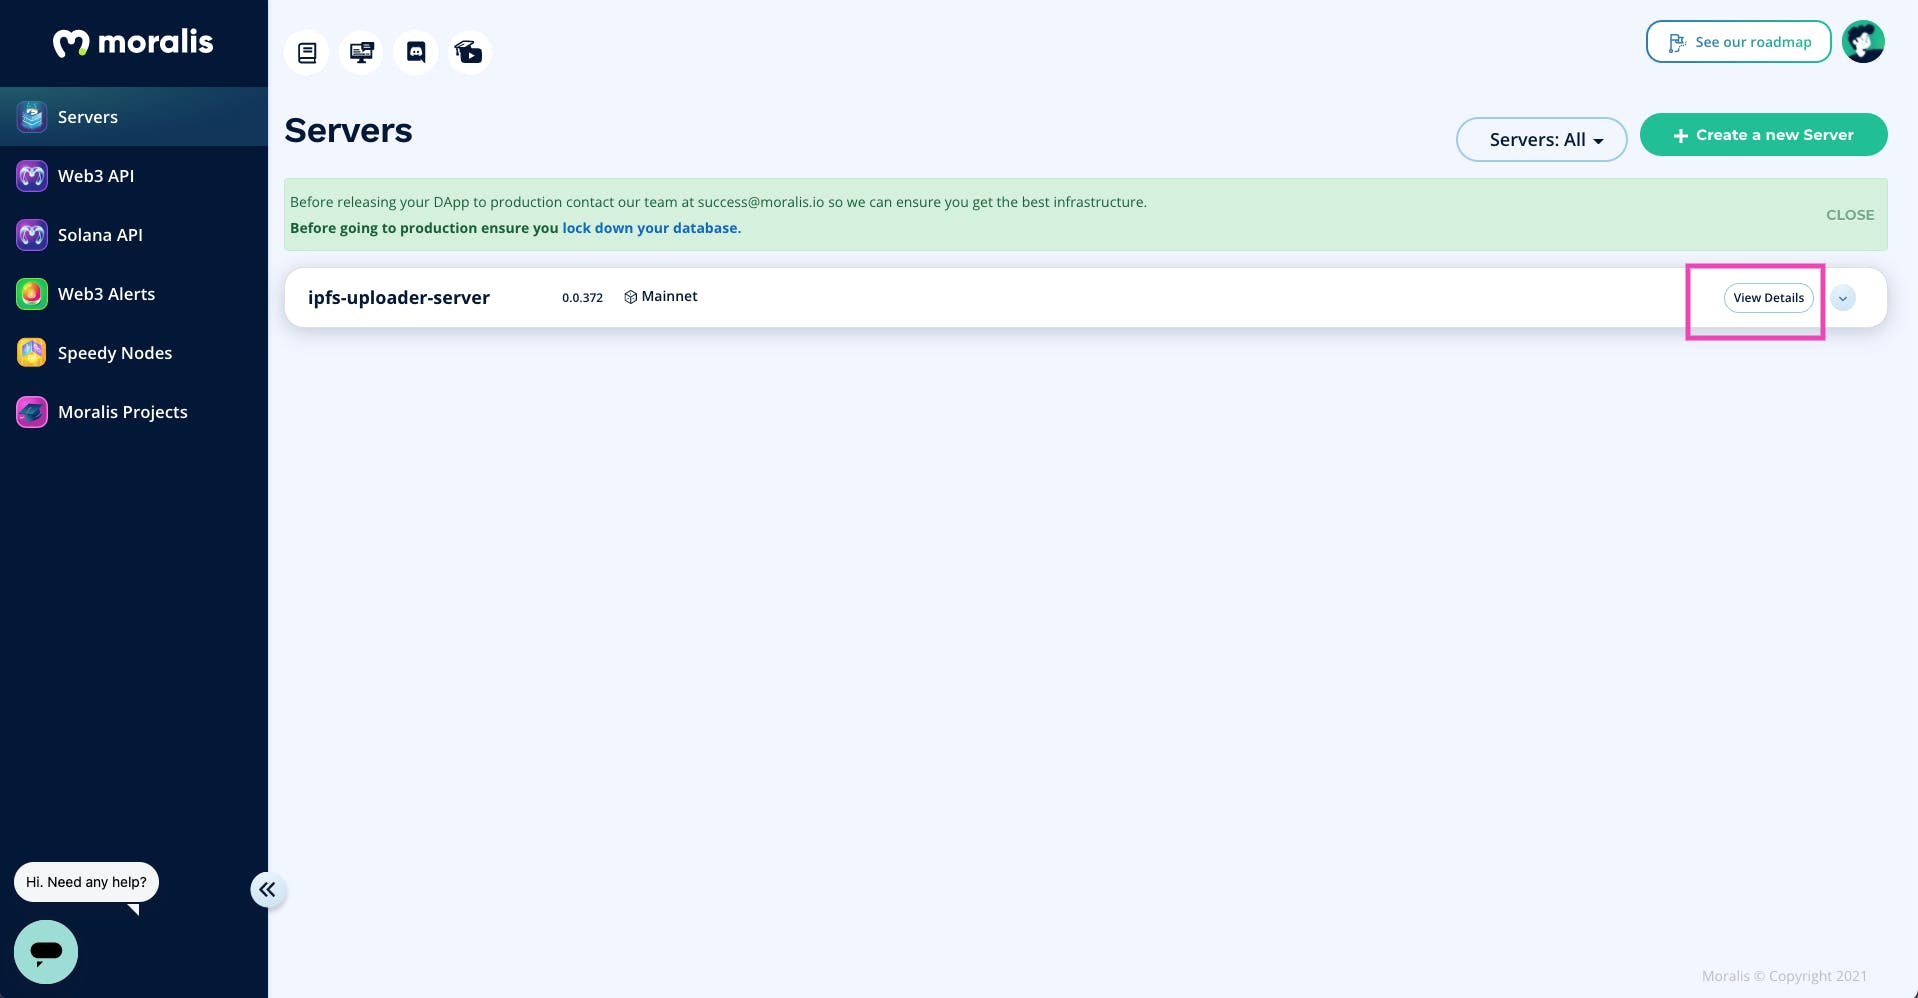
The necessary server particulars that we’d like are:
- The Server URL
- The Utility ID
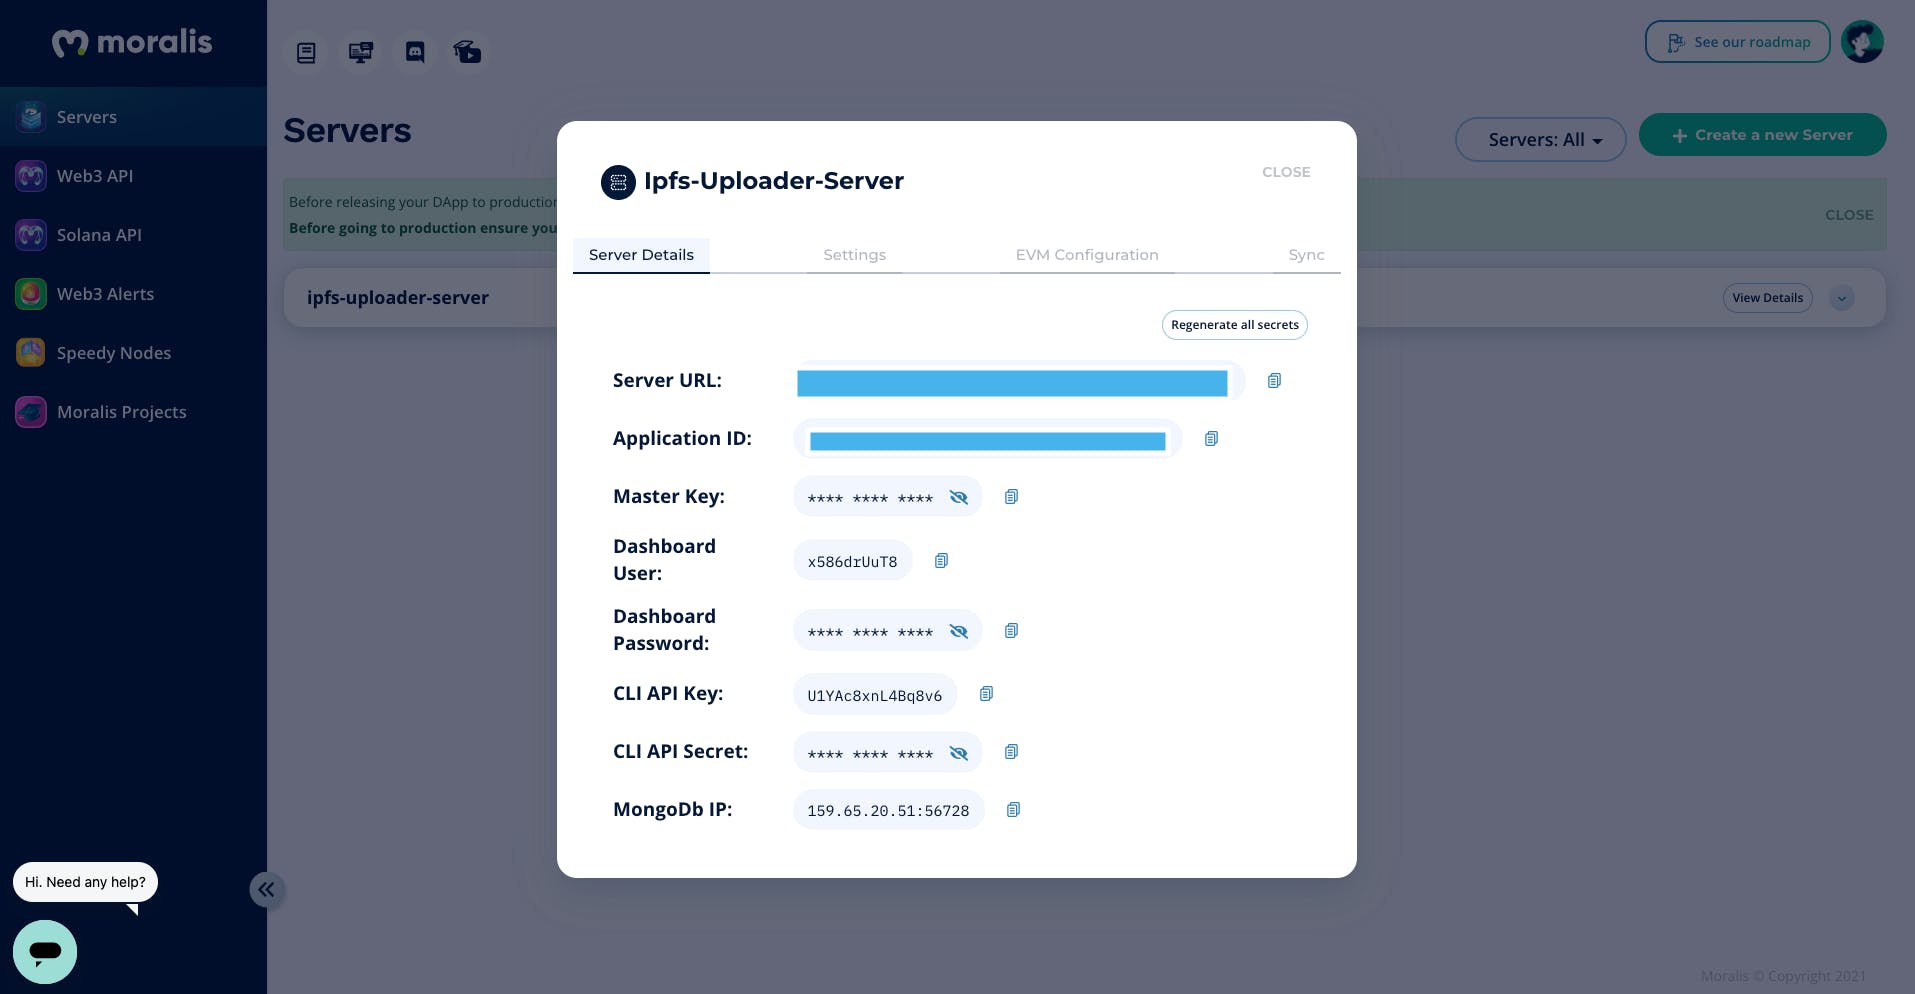
Professional tip: Don’t expose your server particulars, as they offer entry to your dApp.
Step 3 – Making a New React App
On this step, we’ll create a brand new React software with Create React App (CRA) and npx package manager.
Out of your terminal:
-
Navigate to the place you need your IPFS uploader mission to dwell.
-
Run the command beneath to create a brand new
moralis-ipfs-uploaderReact app mission:npx create-react-app moralis-ipfs-uploader -
When it is completed, run the command beneath to navigate to the newly created
moralis-ipfs-uploaderlisting:cd moralis-ipfs-uploader -
Subsequent, begin your React app mission server with the command beneath:
npm run begin -
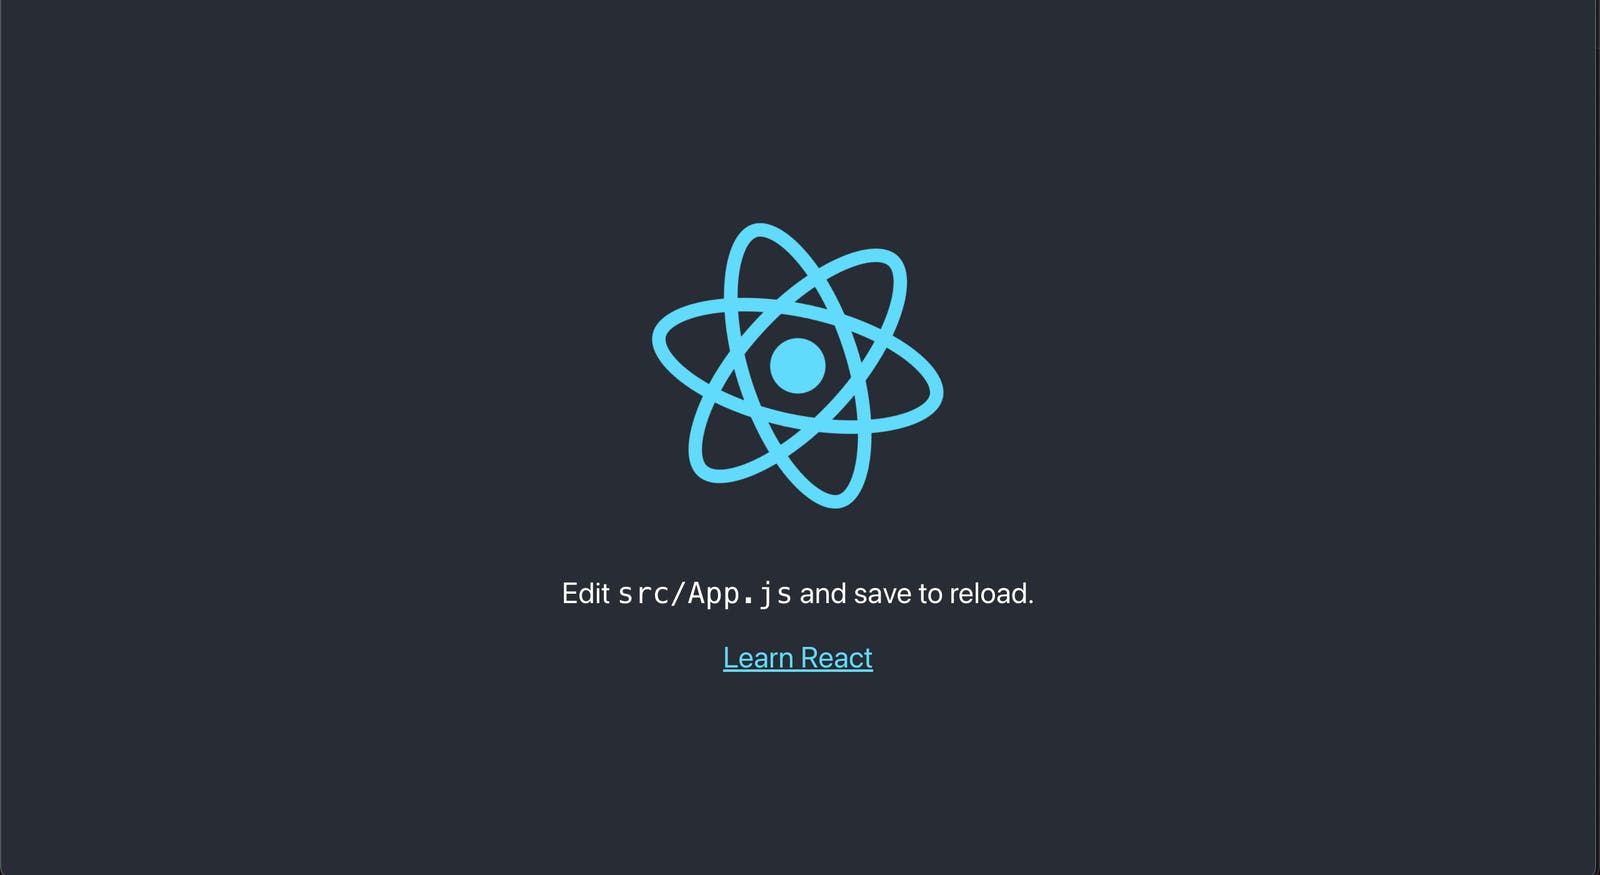
Our growth server will begin up on
localhost:3000. Our React web page ought to appear like this:
Step 4 – Putting in Moralis React SDK
Now that our React software is prepared, we’ll set up the Moralis React SDK.
Run the next command out of your moralis-ipfs-uploader listing terminal:
npm set up moralis react-moralis
Step 5 – Initializing Moralis SDK in React
After organising your Moralis server and putting in the Moralis SDK (see Step 4), the subsequent step is to determine a connection between our React app and our Moralis server by the Moralis SDK.
Create a .env file on the root of your mission and retailer your Moralis server particulars above like this:
REACT_APP_MORALIS_SERVER_URL=https:
REACT_APP_MORALIS_APP_ID=XXXXXXXXXXXXXXXXXXXXXXXXXXXXXX
Exchange the placeholders together with your Moralis credentials. Subsequent, we have to restart our server after updating the src/.env file.
Use the quick key beneath to cease your server:
ctrl + c
Begin your server once more with:
npm run begin
Subsequent, we’ll wrap our App.js part with the moralisProvider from react-moralis. Replace your App.js with the code beneath:
import "./App.css";
import { MoralisProvider } from "react-moralis";

perform App() {
  const serverUrl = course of.env.REACT_APP_MORALIS_SERVER_URL;
  const appId = course of.env.REACT_APP_MORALIS_APP_ID;

  return (
    <MoralisProvider appId={appId} serverUrl={serverUrl}>
      <div className='App'>
        <header className='App-header'>
          <img src={emblem} className='App-logo' alt='emblem' />
          <p>
            Edit <code>src/App.js</code> and save to reload.
          </p>
          <a
            className='App-link'
            href='https://reactjs.org'
            goal='_blank'
            rel='noopener noreferrer'
          >
            Be taught React
          </a>
        </header>
      </div>
    </MoralisProvider>
  );
}

export default App;
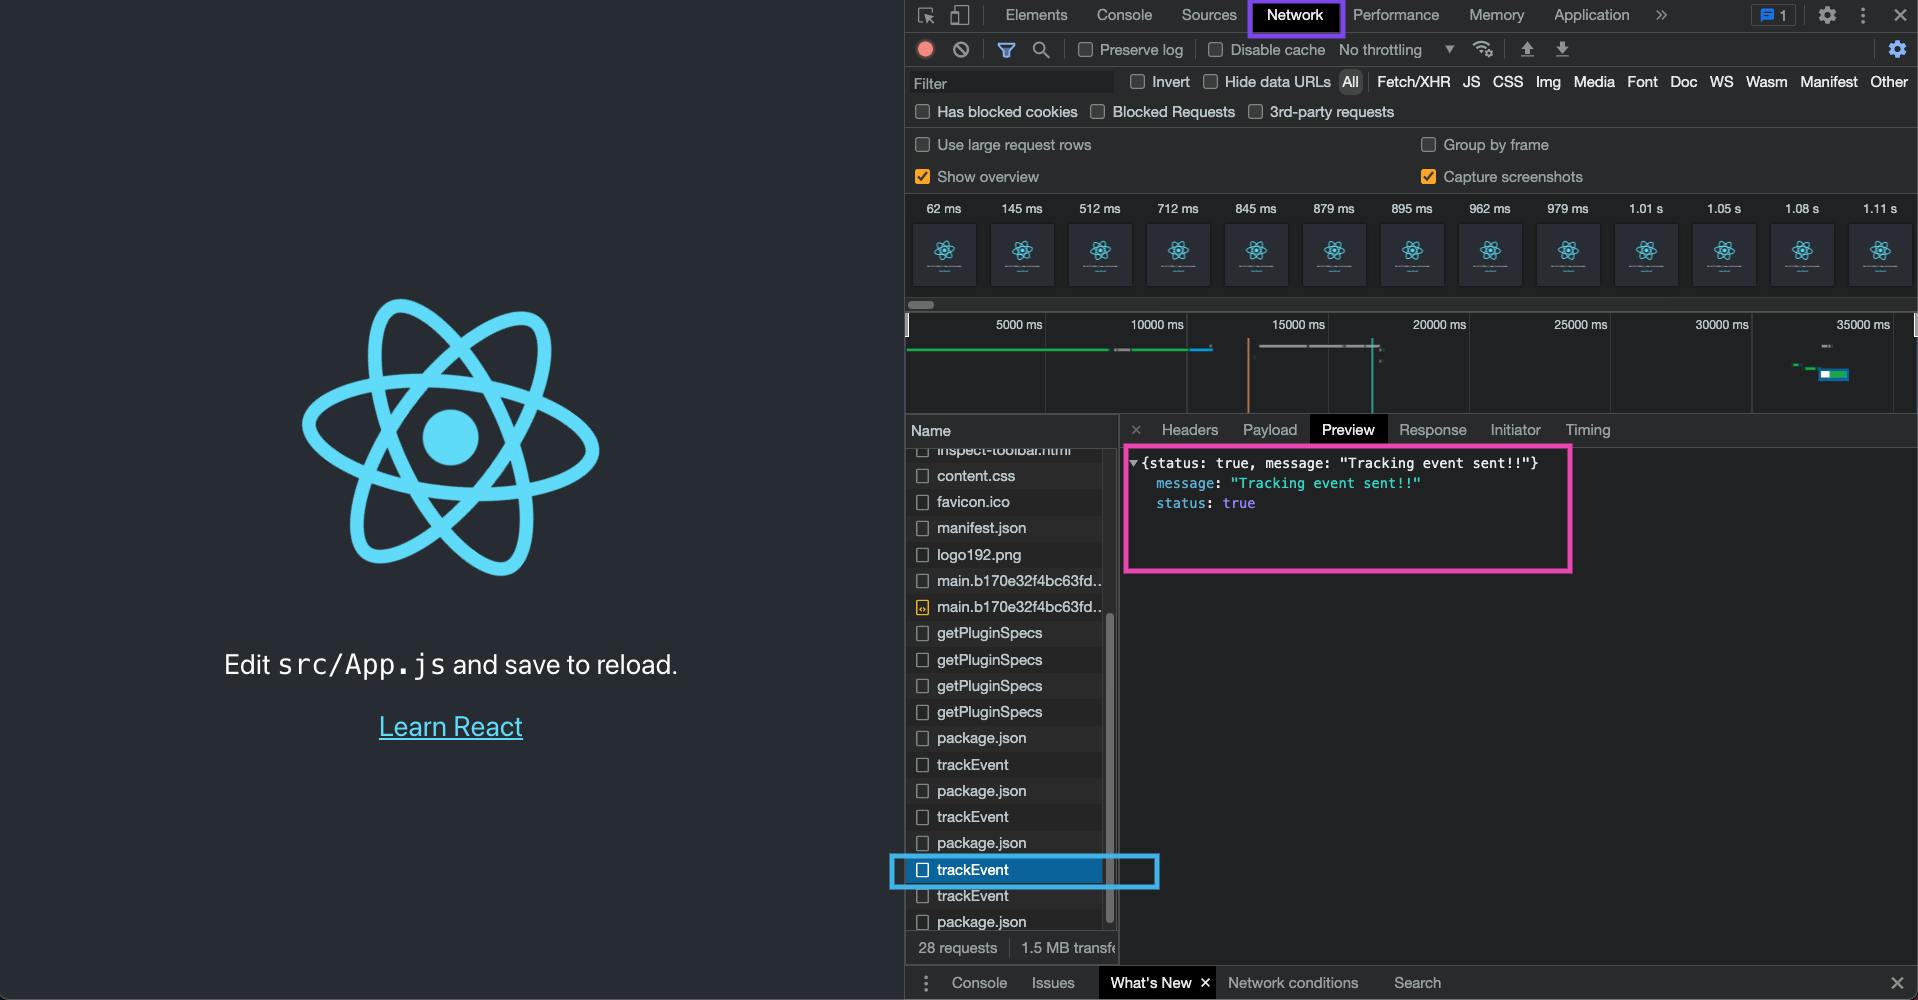
Navigate to your browser community tab and seek for the trackEvent request (refresh the web page if you cannot discover it at first). If the response standing is ready to true meaning our React software has established a reference to our Moralis Mainnet server.
Professional tip: Don’t onerous code your Moralis particulars within the
MoralisProviderpart.
Step 6 – Creating Moralis Login With Pockets Element
On this step, we’ll create the login part of our IPFS uploader. Moralis would not help public file add to IPFS, which implies a person pockets should be related earlier than we will efficiently save a file to the IPFS community with Moralis SDK.
Out of your src folder:
- Create a brand new
partfolder. - Subsequent, create a brand new
authfolder within thepartfolder. - Then, create a brand new
Login.jsxfile contained in theauthfolder with the next strains of code:
import React from "react";
import { FileUploader } from "./../file-uploader/FileUploader";


import Moralis from "moralis";

export const Login = () => {
  const [isAuthenticated, setIsAuthenticated] = React.useState(false);
  const [isAuthenticating, setIsAuthenticating] = React.useState(false);


  const connectWallet = async () => {

    setIsAuthenticating(true);


    Moralis.authenticate()
      .then((person) => {

        console.log(person);
        setIsAuthenticated(true);
        setIsAuthenticating(false);
      })
      .catch((error) => {

        alert("Error authenticating: " + error);
        setIsAuthenticated(false);
        setIsAuthenticating(false);
      });
  };


  if (isAuthenticated) {
    return <FileUploader />;
  }

  return (
    <React.Fragment>
      <button onClick={connectWallet}>
        {isAuthenticating ? "Connecting Your Pockets..." : "Join Your Pockets"}
      </button>
    </React.Fragment>
  );
};
From the code above, we’re rendering a “login” button for the person to attach their pockets by way of MetaMask. When the person’s pockets is related, the authentication state is ready to true in order that we will render the FileUploader part, which we’ll create within the subsequent step.
Replace your App.jsx file with the code beneath to render our Login part:
import "./App.css";
import { MoralisProvider } from "react-moralis";
import { Login } from "./part/auth/Login";

perform App() {
  const serverUrl = course of.env.REACT_APP_MORALIS_SERVER_URL;
  const appId = course of.env.REACT_APP_MORALIS_APP_ID;

  return (
    <MoralisProvider appId={appId} serverUrl={serverUrl}>
      <Login />
    </MoralisProvider>
  );
}

export default App;
Step 7 – Creating Moralis IPFS Uploader Element
On this step, we’ll create our IPFS file uploader part named FileUploader — a kind part that features a file enter and a button for the person to add a file to the IPFS community.
Out of your part folder:
- Create a brand new
file-uploaderfolder. - Within the
file-uploaderfolder, create a brand newFileUploader.jsxandfile-uploader.cssrecordsdata. - Subsequent, copy and paste the CSS code beneath in our
file-uploader.cssfile:
* {
  margin: 0;
  padding: 0;
  box-sizing: border-box;
}

physique {
  background-color: #1d1d1d;
  colour: #fff;
  show: flex;
  flex-direction: column;
  align-items: heart;
  justify-content: heart;
  min-height: 100vh;
}

.form-wrapper {
  width: 100%;
  peak: 100%;
  border: 1px stable #ccc;
  border-radius: 4px;
  box-shadow: 0 0 5px #ccc;
  padding: 10px;
}

.form-wrapper h2 {
  font-size: 1.5rem;
  margin-bottom: 1rem;
  text-align: heart;
}

.kind {
  width: 100%;
  peak: 100%;
  show: flex;
  flex-direction: column;
  justify-content: heart;
  align-items: heart;
}

enter[type="file"] {
  width: 100%;
  peak: 100%;
  border-bottom: 1px stable #ccc;
  padding: 10px;
  font-size: 16px;
  define: none;
}

button {
  width: 100%;
  peak: 100%;
  border: none;
  border-bottom: 1px stable #ccc;
  padding: 10px;
  font-size: 16px;
  define: none;
  background: #00bcd4;
  colour: #fff;
  cursor: pointer;
}
Subsequent, we’ll replace our FileUploader.jsx part with the next code:
import React from "react";
import "./file-uploader.css";
import { Success } from "./../success/Success";


import Moralis from "moralis";

export const FileUploader = () => {

  const [file, setFile] = React.useState(null);
  const [hash, setHash] = React.useState(null);
  const [loading, setLoading] = React.useState(false);


  const uploadFileToIpfs = async (e) => {
    e.preventDefault();


    if (!file) {
      alert("Please choose a file to add");
      return;
    }


    setLoading(true);

    strive {

      const moralisFileInstance = new Moralis.File(file.identify, file);


      await moralisFileInstance.saveIPFS({ useMasterKey: true });


      console.log(moralisFileInstance.ipfs(), moralisFileInstance.hash());


      setHash(moralisFileInstance.hash());
    } catch (error) {

      alert("Error importing file to IPFS: " + error);
    } lastly {

      setLoading(false);
    }
  };


  if (hash) {
    return <Success hash={hash} setHash={setHash} />;
  }

  return (
    <div className='form-wrapper'>
      <h2>Moralis IPFS Uploader</h2>
      <kind>
        <enter
          sort='file'
          onChange={(e) => {
            setFile(e.goal.recordsdata[0]);
          }}
        />
        <button onClick={uploadFileToIpfs}>
          {loading ? "Importing..." : "Add"}
        </button>
      </kind>
    </div>
  );
};
From the code above, when an authenticated person has efficiently uploaded a file to the IPFS community, we will then retrieve the hash of the file from the moralisFileInstance.hash() methodology.
We’ll move the hash and setHash as a prop to the <Success /> part which we’ll create within the subsequent step.
Step 8 – Creating Moralis IPFS Success Element
On this closing step, we’ll create the <Success /> part that will likely be rendered after a file has been efficiently created and the file hash is current.
In your part folder:
- Create a brand new
successfolder. - Subsequent, create a brand new
Success.jsxandsuccess.cssfolder within thesuccessfolder. - Subsequent, copy and paste the CSS code beneath in our
success.cssfile:
.card {
  background-color: #fff;
  border-radius: 2px;
  box-shadow: 0 2px 5px 0 rgba(0, 0, 0, 0.16), 0 2px 10px 0 rgba(0, 0, 0, 0.12);
  margin-bottom: 20px;
  padding: 20px;
}

.card-body {
  padding: 0;
  colour: #00bcd4;
}

.card-title {
  font-size: 1.5rem;
  margin-bottom: 1rem;
  text-align: heart;
}

.card-text{
    font-size: 1.2rem;
    margin-bottom: 1rem;
    text-align: heart;
}


.card-text-h3{
    font-size: 1.2rem;
    margin-bottom: 1rem;
    text-align: heart;
}

.card-text-span{
    font-size: 0.8rem;
    margin-bottom: 1rem;
    text-align: heart;
    font-weight: 500;

}

.img-wrapper {
  peak: 255px;
}

img {
  width: 100%;
  peak: 100%;
}

.card-footer {
  show: flex;
  justify-content: space-between;
  align-items: heart;
  justify-content: heart;
}

.card-footer button {
  width: 50%;
  peak: 100%;
  padding: 10px;
  font-size: 16px;
  colour: #00bcd4;
  background: #fff;
  border: 1px stable #ccc;
  border-right: none;

}

.card-footer a {
    width: 50%;
    peak: 100%;
    border: 1px stable #ccc;
    border-left: none;
    padding: 10px;
    font-size: 16px;
    define: none;
    text-align: heart;
    background: #00bcd4;
    colour: #ffffff;
    text-decoration: none;
}
Subsequent, we’ll replace our Success.jsx part with the next code:
import React from "react";
import "./success.css";
export const Success = ({ hash, setHash }) => {
  return (
    <div>
      <div className='card'>
        <div className='card-body'>
          <h5 className='card-title'>Success! 👍 </h5>
          <p className='card-text'>Your file has been uploaded to IPFS.</p>
          <h3 className='card-text-h3'>
            File Hash: <br />
            <span className='card-text-span'>{hash}</span>
          </h3>
          <div className='img-wrapper'>
            <img
              src={`https://ipfs.moralis.io:2053/ipfs/${hash}`}
              alt='ipfs-img'
            />
          </div>
        </div>
        <div className='card-footer'>
          <button onClick={() => setHash(null)}>Again</button>
          <a
            href={`https://ipfs.moralis.io:2053/ipfs/${hash}`}
            goal={"_blank"}
            rel='noopener noreferrer'
          >
            View on IPFS
          </a>
        </div>
      </div>
    </div>
  );
};
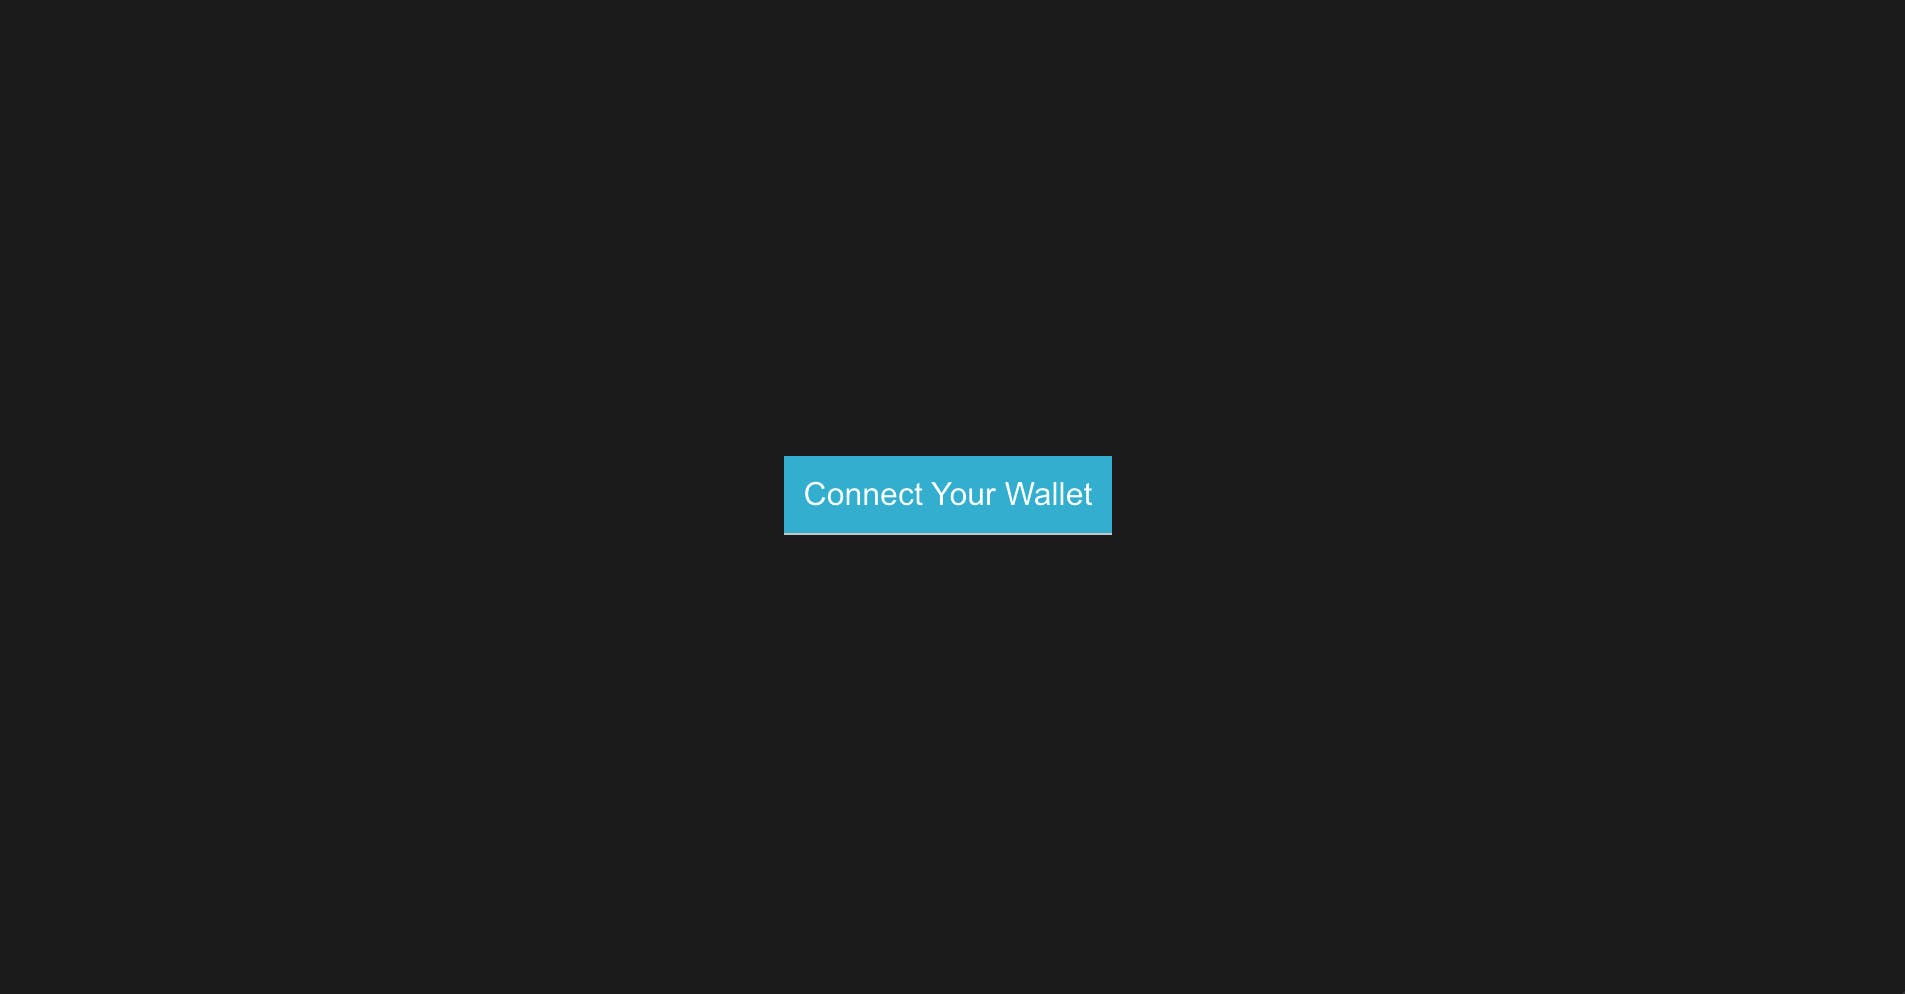
Our Login web page ought to appear like this:
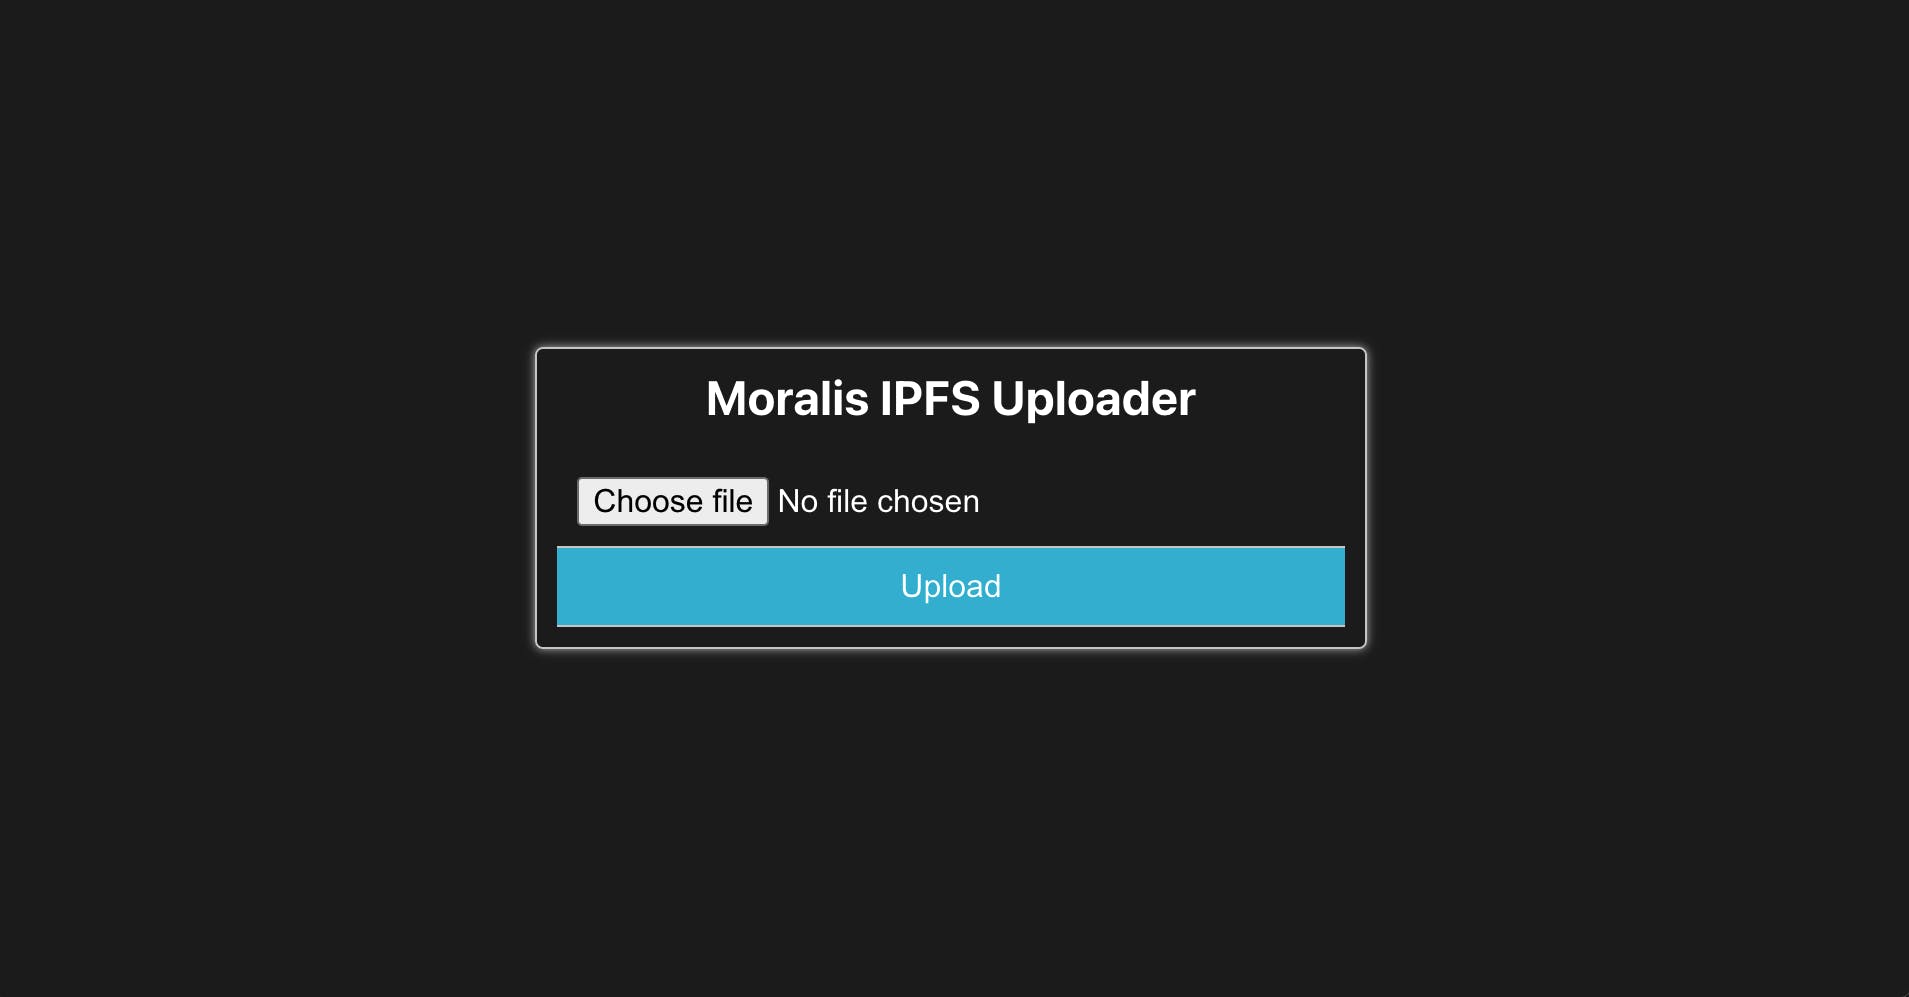
Our IPFS uploader ought to appear like this:
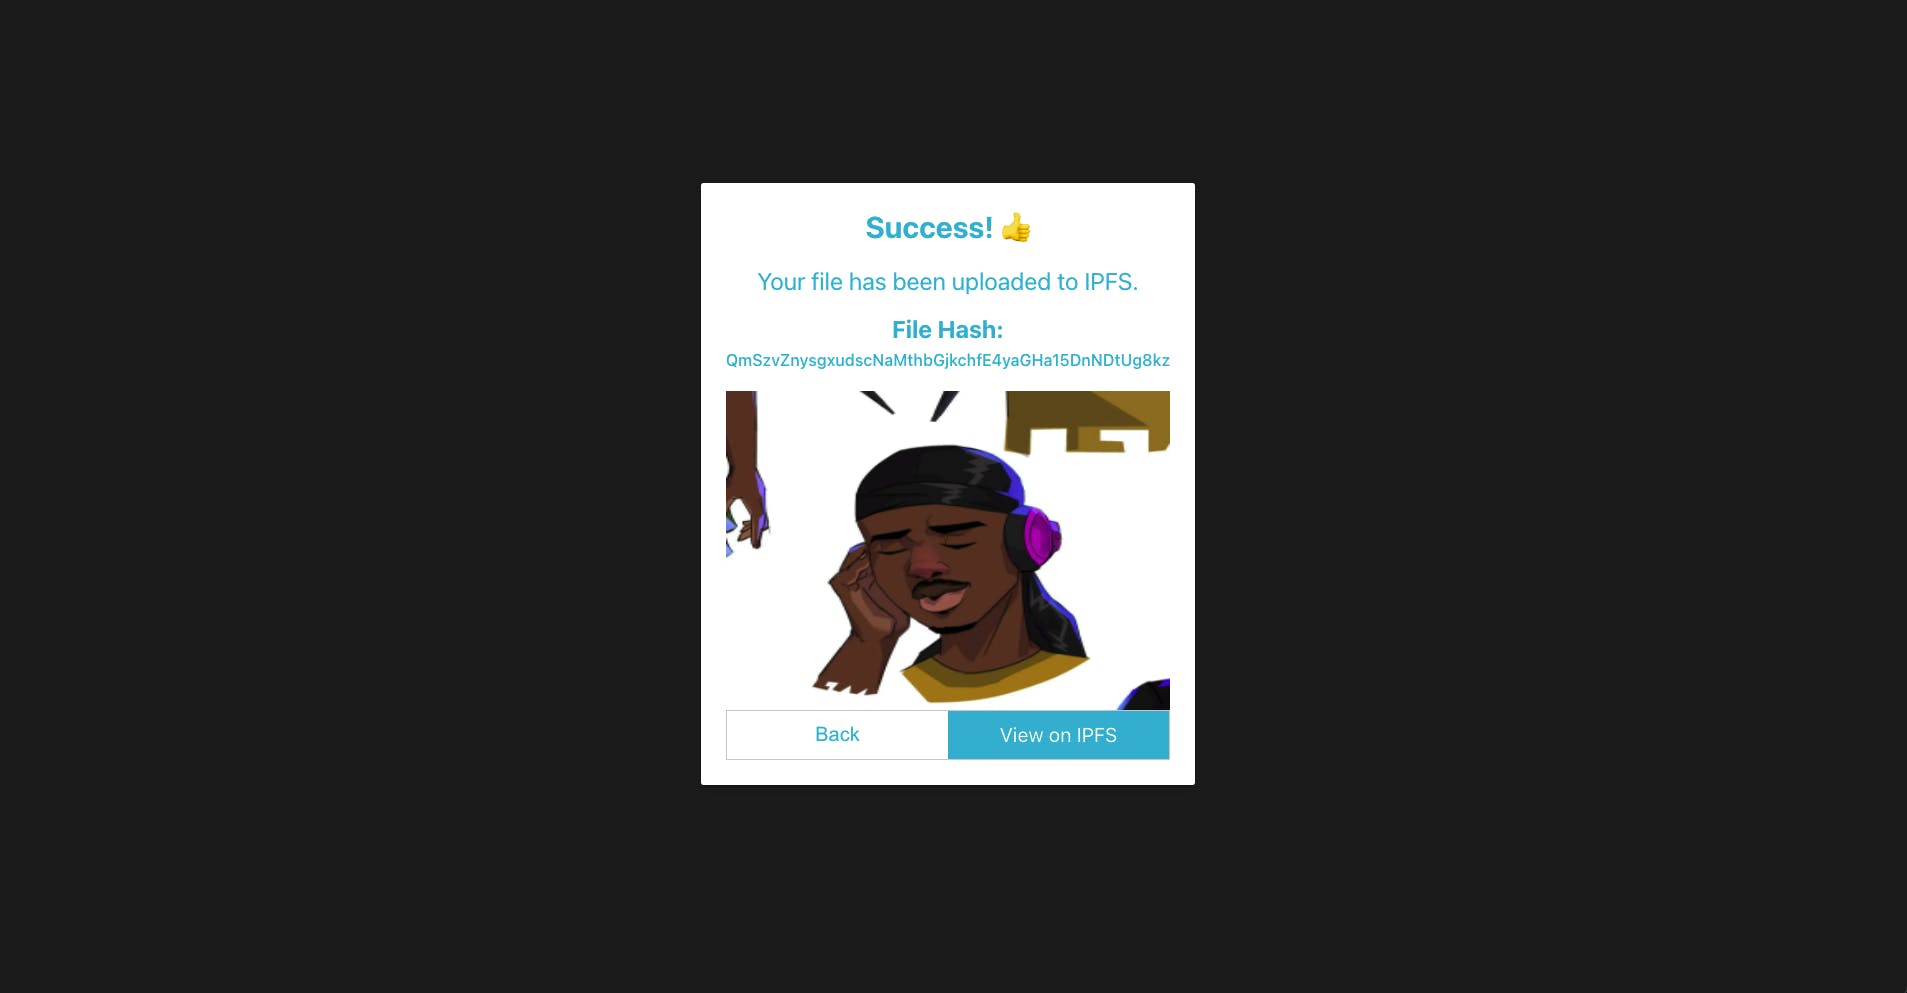
Whereas our success web page ought to appear like this:
Wrapping Up
InterPlanetary File System (IPFS) is a dependable and decentralized storage system. It is usually extensively thought to be the way forward for file storage.
On this article, we realized the right way to add and entry contents from the IPFS community utilizing Moralis SDK.
This text is part of the Hashnode Web3 blog, the place a group of curated writers are bringing out new assets that can assist you uncover the universe of web3. Examine us out for extra on NFTs, DAOs, blockchains, and the decentralized future.


